Film Program at the UCF Nicholson School of Communication and Media
Generating Proxies in DaVinci Resolve
Overview
Importing your footage into DaVinci Resolve first helps to streamline roundtripping of your NLE’s XML file for final color grade after picture-lock. Users can group their source clips into Media Pool folders for each reel and “string-out” their dailies onto individual timelines within the project. Once these string-outs are assembled, a LUT and/or “best light” color grade can be quickly applied to all the clips for each scene, which can then be exported to the desired proxy format.
This workflow was made with DaVinci Resolve version 18.6 in mind. There may be some differences compared to other versions of the application. We try to update as frequently as possible, particularly when a critical change to the process has been made.
Workflow Steps:
1) Import Media
- A) Launch DaVinci Resolve and start a New Project and name it with an identifying title for your production.
- B) Select the Media page at the bottom of the application.

- C) Within the Media Storage Browser window (located at the top right side of Media page), navigate to the media clips located on your external disk.
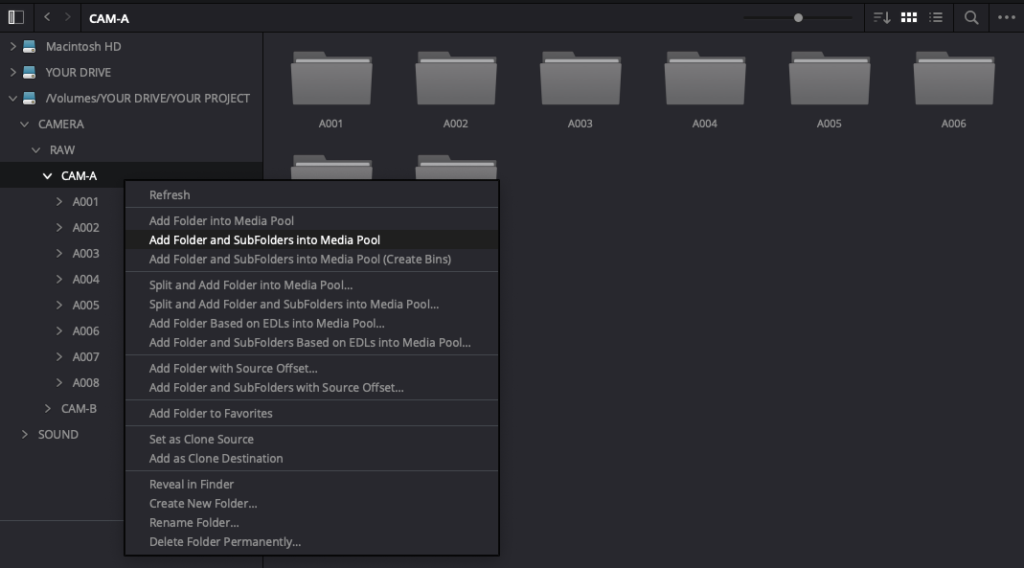
- D) Add these clips by right-clicking on them. From the drop-down menu, select Add Folder and Subfolders to Media Pool.
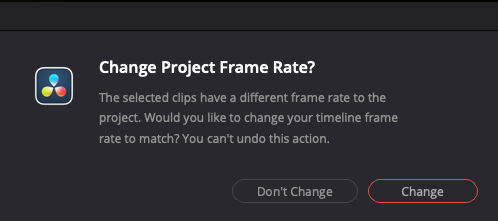
- E) If prompted, change your project settings to match the settings of the imported clips (e.g., Change Your Project Frame Rate? Select, Change).
2) Organize Clips
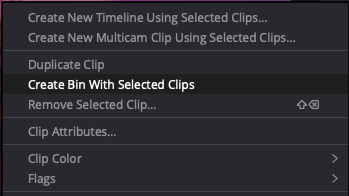
- A) Within the Media Pool window (located across the bottom of the Media page), organize your clips by each camera reel (this is optional but strongly recommended). To do this, select all the clips for each reel (e.g., all clips starting with A001) and right-click. From the drop-down menu, select Create Bin with Selected Clips.
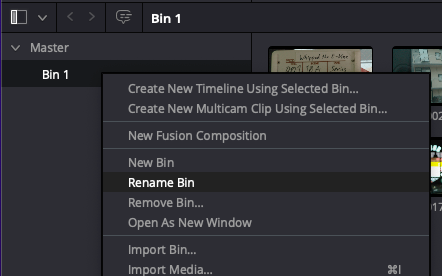
- B) On the left side of the Media Pool, right click on the newly created Bin and rename it to match the corresponding reel # (e.g., A001 for camera reel A001).
3) Sound Sync Dailies
Please refer to this video until we are able to publish a step-by-step guide.
4) String-Out Dailies
- A) Select the Edit page at the bottom of the application.

- B) Go to File and click on New Timeline.
- C) In the Create New Timeline window that pops up, name the Timeline with the corresponding reel number from each camera’s media dump (e.g., Reel “A001” becomes Timeline “A001”).
- D) Select all the clips in that bin and drag them into the new Timeline.
- E) All of the clips for that reel should now be in sequential order on the Timeline.
5) Burn-In a LUT
- A) Select the Color page at the bottom of the application.

- B) In the Node Editor window (top left of the Color page), click on the Clip v. From the drop-menu, change from Clip to Timeline.
- C) In the Node Editor window, right-click on the background and select Add Node > Corrector from the drop-down menu to add a new node.
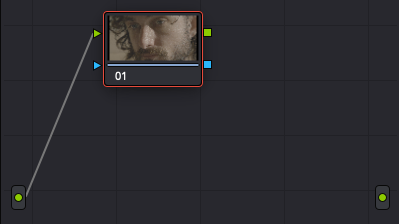
- D) Connect this new node by linking the green dot on the left side of the Node Editor window to the Input Green Triangle on the node.
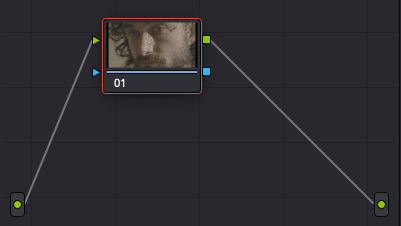
- E) Then link the Output Green Square on the Node to Green Dot on the right side of the Node Editor window.
- F) Right-click on the new timeline node.
- G) In the drop-down menu, navigate to LUT and then select the appropriate option based on the make and model-type of the camera that was used to acquire the source clips (e.g., Blackmagic Gen 5 Film to Video v4 for footage from a Blackmagic Pocket 6K Pro Cinema Camera shooting in log aka “Film” or Sony SLog3 to Rec 709 for all Sony FX series cameras shooting in Slog.).
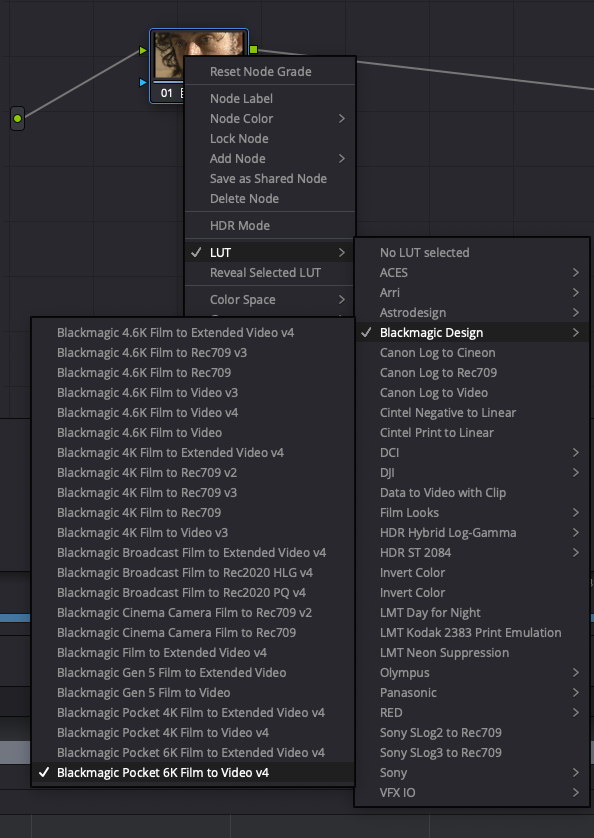
This should apply the LUT across all clips in the current Timeline.
6) Exporting Proxy Clips
- A) Select the Deliver page at the bottom of the application.

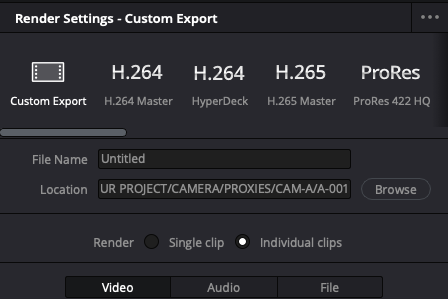
- B) In the Render Settings window (located at the top left of the Deliver page), under Custom Export:
- C) Click on Browse and navigate to where you would like your proxy files to be exported onto your drive. Create a New Folder for reach Timeline / Reel (e.g., Timeline A001 is exported as a Reel A001, Timeline A002 is exported as Reel A002, etc.).
- D) Change the Render setting from Single Clip to Individual Clips.
- E) Within the Video tab, verify that Export Video is checked and that the following settings are selected from the drop-down menus:
- Format: Select QuickTime
- Codec: Select Apple ProRes
- Type: Select Apple ProRes 422 Proxy
- Resolution: Select 1920 x 1080 HD
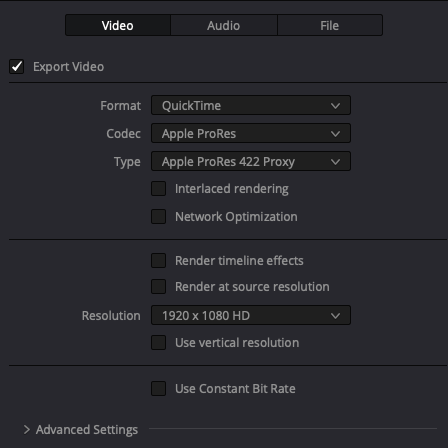
- F) Within the Audio tab, verify that the Export Audio tab is checked and that the following settings are selected from the drop-down menus:
- Codec: Select Linear PCM
- Channels: Select Same as Source
- Bit Depth: Select 24
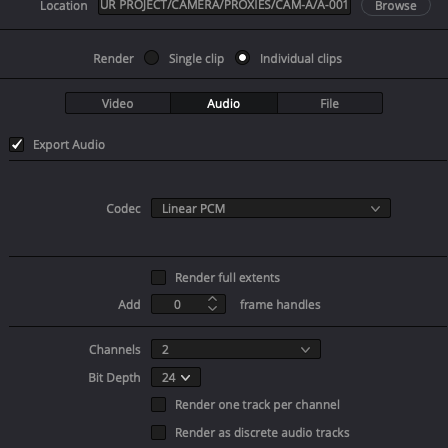
- G) Within the File tab, make the following changes:
- Filename Uses: Toggle to Source Name.
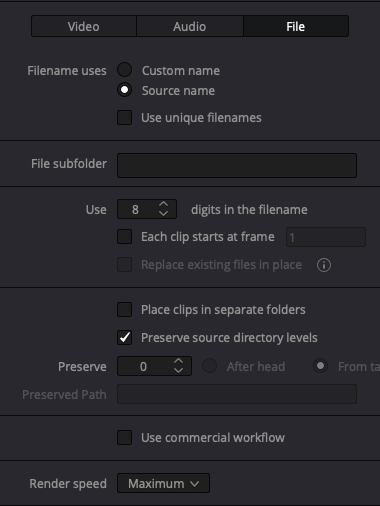
- H) Click on the Add to Render Queue button (located at the bottom of the Render Settings window). This will add a Job box to the Render Queue window (located on the top right of the Deliver page).
- I) To start rendering this Job, click on the Render All button (located at the bottom of the Render Queue window).