Knowledge Base of Instructional Resources and Production Services
Film Program at the University of Central Florida
AVCHD Simplified Workflow Using Adobe Prelude
Overview
Adobe Prelude is a video ingest, logging, and transcoding program designed principally for media organization and metadata entry. Though lacking some key features for editing, Prelude is extremely useful for the initial ingest of content for any projects that handle a large volume of AVCHD / MTS file media.
This workflow is one the easiest and most effective ways to ingest and transcode AVCHD / MTS file media to Apple ProRes 422 Quicktime files for use in Adobe Premiere Pro, or most other non-linear editing (NLE) software, for assembly. Particularly if you are dealing with camera systems that may record video across multiple SD memory cards.
The AVCHD format is actually not a single video file, but a collection of MTS files placed in a hierarchical structure derived from the same file structure found in Blu-ray Discs. MTS files contain video in the MPEG-4 / h.264 codec and audio in either Dolby Digital AC-3 codec or Linear PCM (uncompressed).
AVCHD collections do not natively playback with the macOS environment and should be ingested directly from the recording source (i.e. SD memory card). Copy and pasting AVCHD collections from memory cards to your external drive can lead to ingest errors. Direct cloning of a memory card’s entire file structure is the best way to preserve the integrality of the AVCHD collection when making backups.
Media Ingest, Transcode, and Import
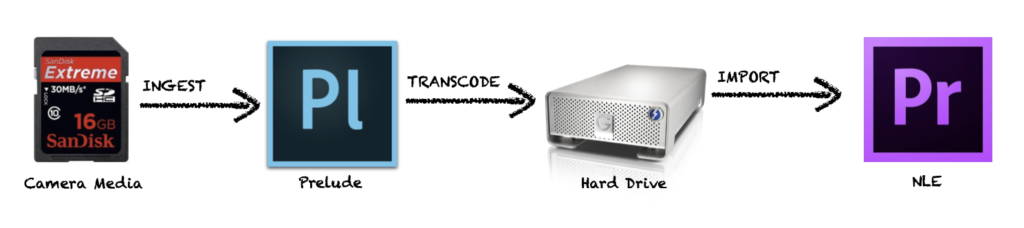
This AVCHD media workflow using Adobe Prelude is simple and easy to use. In quick summary, you ingest AVCHD / MTS files directly from the camera’s SD memory card using Adobe Prelude, transcode new files out to your project’s designated external drive, and import them into the NLE you are using (see Diagram 1).
From there, you import the new transcoded clips into any NLE software and begin the assembly process.
Step 1 – Mount Media
Open Adobe Prelude. Insert your camera’s SD memory card into a USB card reader attached to your computer. Wait until the card mounts, then select Ingest from the tabs at the upper-right of the interface (see Diagram 2).

Step 2 – Select Clips From Memory Card
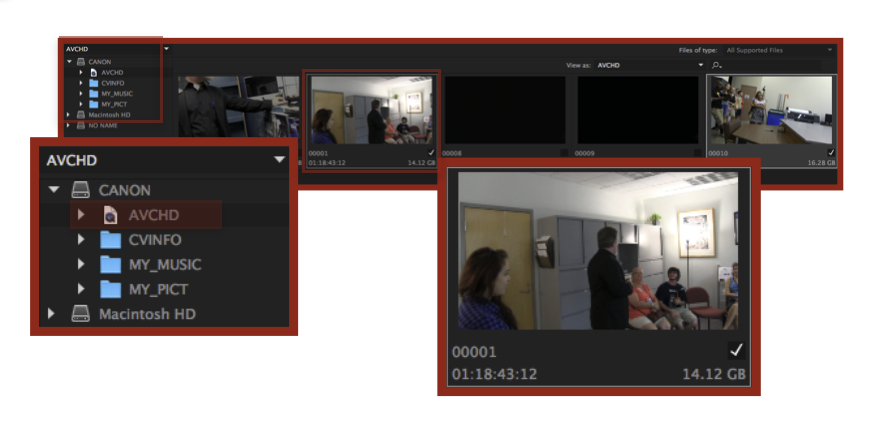
Locate the mounted memory card and open the file directory. Then locate and select the file collection named “AVCHD” inside. In the Ingest preview area, checkmark the individual clips you would like to ingest – in the bottom right corner when in Thumbnail view (see Diagram 3). You can also just select the “Check All” button at the bottom of the Ingest window to ingest all AVCHD / MTS media files in that directory.
Step 3 – Set Clips to Transfer to your External Drive
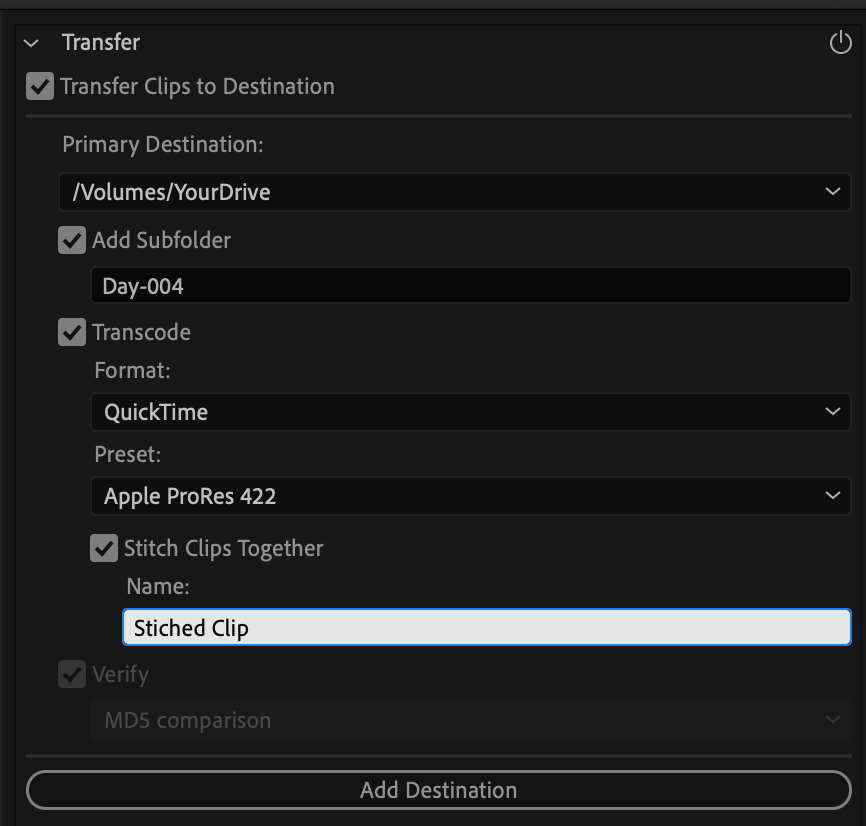
On the right side of the Ingest window, check “Transfer Clips to Destination.” Choose your external drive under “Primary Destination.” Check “Add Subfolder” and a create folder for that drop (or whatever increment best matches your production – i.e. days, drops, camera type, etc.).
Step 4 – Transcode Settings
Check “Transcode” and make sure the Format is set to “Quicktime” and the Preset is “Apple ProRes 422” (ProRes 422 is what we recommend, but you can use whatever variant you think best suites your project’s needs). Specifications such as frame size and frame rate are automatically determined by the specs of the AVCHD source media.
If the camera has broken media into separate clips across more than one card (this happens often in camcorders with multiple SD memory card slots), be sure to check the “Stitch Clips Together” option and give the new file it will create a name. This will rebuild the portioned clips into a single file for editing.
File verification only applies if you are just ingesting media without also transcoding it.
Step 5 – Initiate Ingest
Then press the “Ingest” button at the bottom right-hand corner of the Ingest window.

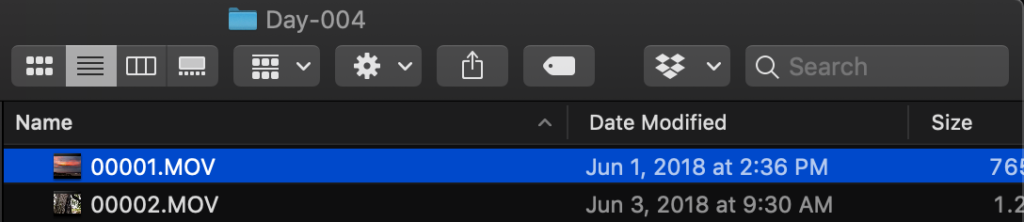
Once Adobe Prelude has completed ingesting and transcoding your AVCHD media to Apple ProRes 422 QuickTime files, you can save your Prelude project file and close the application. You should be able to find your clips in the Primary Destination Subfolder that you created in Prelude (see Diagram 6). These clips are ready for import and assembly in the NLE of your choice.
Step 6 – Import Media
Open Adobe Premiere Pro (or whatever NLE software you choose to use).
Using the Media Browser window, navigate the computers file system to locate the clips on your external drive, right-click and select import.
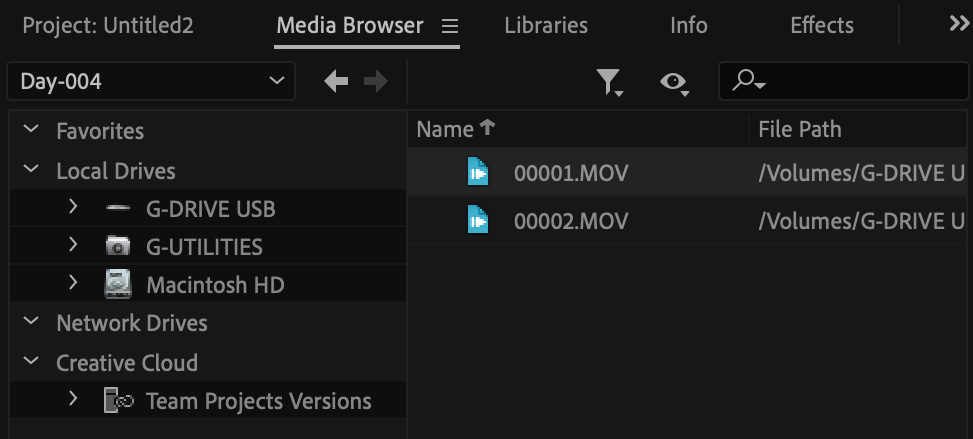
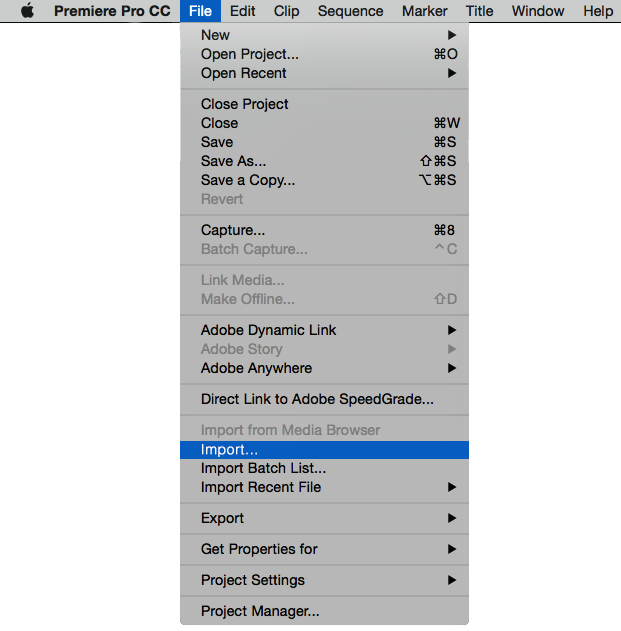
Or just go to File > Import and then locate the clips on your external drive. Either highlight individual clips or import a whole folder.
Once all of the clips are imported, you are free to start the assembly process.
Considerations
It is recommended that with projects that will have long total running times, or that will have many video layers, should not be assembled natively with AVCHD or h.264 media in your NLE sequence. As the real-time playback of these highly compressed, and system demanding, codecs will eventually lead to playback artifacts and performance issues within the NLE. Transcoding to a codec with a lower compression rate, such as Apple ProRes 422, is suggested.
The original version of this article included contributions by Zachary Beckler.